Let’s go through each stage of growing cannabis in soil. The more you know about the processes the easier it will be to grow good weed at home. This page offers a basic rundown of the entire process. If you require detailed information about any of these stages, please refer to our blog or our beginner’s guide to cannabis cultivation which is free to download (look below the article).
Germination
Germinating seeds before putting them directly in soil is the key to successful sprouts. Place your seeds in a damp paper towel and leave them in a warm dark place. After 1-2 days, the tap root will emerge from the seed. They are now ready to be planted in soil or whichever medium you choose.

These seeds were placed in a moist paper towel and left in a dark warm place for 4 days. You can see the tap root emerging from the seed shell.

Gently place the seeds in a starter pot. If you can manage to point the tap root down, your seedling will sprout a little sooner.

This photo was taken about 2 weeks after the germinated seed was planted. It another 2 weeks it should be ready to transplant into a larger pot.
Seedling Stage
Create a soil mix using Reefertilizer Start. Add enough water to make the soil mix moist but not soaking wet. Fill a small starter pot with the soil mix and make a half inch deep hole in the center. Gently place your seed in the hole and cover with loose soil.
If you start by planting your seeds in a smaller starter pot you will need to transplant them to a larger pot when they’re big enough. Using starter pots makes it easier to handle and maintain sprouts. It also provides a stronger root base.

If you’re having a hard time maintaing the right environment for the seedlings, you can place a plastic bag over the starter pot. This will help hold moisture in the soil. Don’t leave it on for longer than a few days though, it will cut off fresh air from your young sprout.
")
This seedling is almost big enough to transplant into a larger pot. When the leaves are reaching out further than the mouth of your pot it’s usually a good indicator the roots will soon need more room to grow.

After a week, the seedling on the left was ready to transplant. You can see the healthy white root growth holding the soil together. When transplanting you want the soil to be slightly moist and not dry. If it’s too wet, the soil will crumble and damage the roots during the transplant process.
Reefertilizer Start
A powerful combination that helps feed young plants while growing helpful mycorrhizal fungi in your soil.
Vegetation Stage
Once the plant has 3-4 sets of leaves, begin feeding them cannabis nutrients. Start with a low dose of Grow on the first week, a medium dose on the second week, and a full dose every additional week.
The plant should grow quickly, this is the best time to train your plant for optimizing growth. Training your plant means manipulating the branches to grow in specific directions. A plant that grows “au naturel” will grow tall since individual branches will be fighting each other for light. By tying branches down, your plant will make better use of horizontal space and soak up more light energy.


Topping your plant is a technique used to easily increase the overall yield of your plant. By snipping away the new growth on a young plant, you will trigger the plant to grow multiple new branches from the cutting point. This will double the number of top branches; these usually grow the largest buds.

Give your plant enough water so that the soil is completely saturated. Bigger plants will require more water and nutrients than smaller plants. When the plant is small you may only need to water them once a week. When they get larger, your plants will require water more often.

Tying branches down will help your plants grow much more evenly. This is a type of low stress training that won’t damage your plants. By holding branches down and away light can reach leaves that were once in the shade.
Flowering Stage
Once you switch to a 12/12 light cycle or the buds begin to form, it’s time to switch to using Bloom.
Start with a low dose of Bloom on the first week of flower, A medium dose the second week, and a full dose every additional week.
You can optimize growth by removing any leaves that aren’t receiving direct light at the beginning of the flowering stage.


Defoliating your plant at the beginning of the flowering stage will give you fewer bud sites, but larger buds overall.
Start by removing smaller branches and clusters that aren’t receiving light.
The plant will redistribute energy to the remaining bud sites. Your plant may look droopy after the process but will bounce back quickly.

During the flowering stage, keep an eye on the relative humidity around the plant.
When your buds are swelling up, they have a tendency to hold a lot of moisture.
Keep the humidity at 50% or lower and avoid getting water onto bud sites, too much moisture will promote mold growth.

The trichomes of the cannabis buds are where the majority of cannabinoids can be found. These small, tree-like structures also indicate the potency and ripeness of your plant.
For most of the flowering stage, they will be clear. They will become cloudy as the plant ripens, and slowly turn amber when they peak.
Flush & Harvest
Your plant is mature when the hairs on the buds are 80% orange. For more accuracy use a microscope to look at the trichomes. If 80% of the trichomes are cloudy, your plant is ready to flush then harvest.
Flushing your plant will help remove any excess nutrients from the soil and improve the quality of the harvest. To flush your plant, give it plenty of pH balanced water, twice the volume of the planter will be enough. Do this one week before harvest.
Harvest your plant by clipping the branches or buds. Trim away any leaves and let them dry in a cool place for 5-7 days.
Once the stems snap when bent, the buds have completed drying and are ready to consume.
Drying racks are a great tool to dry as much cannabis as possible in a small amount of space.
Optimum Environment for Drying Cannabis:
Temperature: 15°C – 20°C
Humidity: 40% – 50% humidity
To improve the taste and quality, cure your buds. Curing allows time for the breakdown of chlorophyll and carbohydrates and will greatly improve the final product. To cure your buds, place them in an airtight container. Remove the lid once or twice a day for 20 minutes, this is called burping. Burp your containers for 2-3 weeks. Adding a two-way humidity pack to the container will help as well.

A spare closet is a great place to hang your buds to dry. For small harvests, the smell won’t be that obnoxious. If you’re harvesting several plants, you may want to consider using a carbon filter to remove the smell.

Buds are dry when the stems snap instead of bend. These buds are technically ready to consume or process. You can greatly improve their smell and flavour by curing them for up to a month.

Cure your harvested buds in clear reusable mason jars. Maintaining the relative humidity between 58% and 65% inside the jars and storing them in a cool dark environment will help the curing process. 2-way humidity packs are a great way to maintain that humidity level.
If you want to learn even more about growing good cannabis, we offer a free 40+ page guide full of images.
Now available on Amazon.
Sign up for our newsletter and download the digital copy today!
This guide will answer many questions about growing cannabis, like the following...
Selecting Seeds
Identify and Correct Problems
Maximize Yield
Much More...
Get a Chance to INSTANTLY WIN a Reefertilizer Nutrient Kit When You Sign Up.
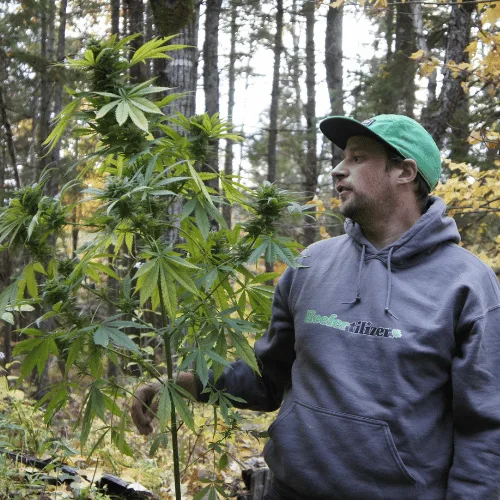
Mike Drouin is the co-founder of Reefertilizer. He’s an experienced craft cannabis grower and a writer of many articles regarding the process. Mike lives on Vancouver Island and enjoys cycling and camping and will sometimes combine the two.
Comments are closed.